Fishing is one of the best hobbies that brings happiness, fresh air, and lasting memories. A broken rod can spoil your fishing moments. With a broken rod, you can’t enjoy your fishing experience or catch a fish. Many rod problems can happen, and there are so many ways to fix a fishing rod. If it’s damaged, broken, or something else, we can fix it at home with basic tools and knowledge.
Fishing with a rod saves money and keeps your favourite gear always ready for fishing. In this article, we are going to explain how to fix a fishing rod, step-by-step details, common problems, tools you need, why repairs matter, fishing rod replacement guide, and a short conclusion. Let’s get into:
Fix the Fishing Rod (Detail-Guide)
There are multiple problems that anglers face, but it’s not difficult at all to fix. You only need the right direction and the basic equipment to fix a broken or damaged fishing rod. Here’s the step-by-step detail from identifying the issue to fixing it in a proper manner. Let’s understand the steps:
Step 01: Tools Management and Spot Problems (Before Fixing)
Before diving into the details of fixing a fishing rod’s problems, we need to understand what are the basic requirements before fixing. Checking and identifying where the damage needs to be done and what the basic tools and equipment we are going to use to fix it are important. To avoid a mess, we need to look for the damage first and collect the equipment. Let’s go through it:
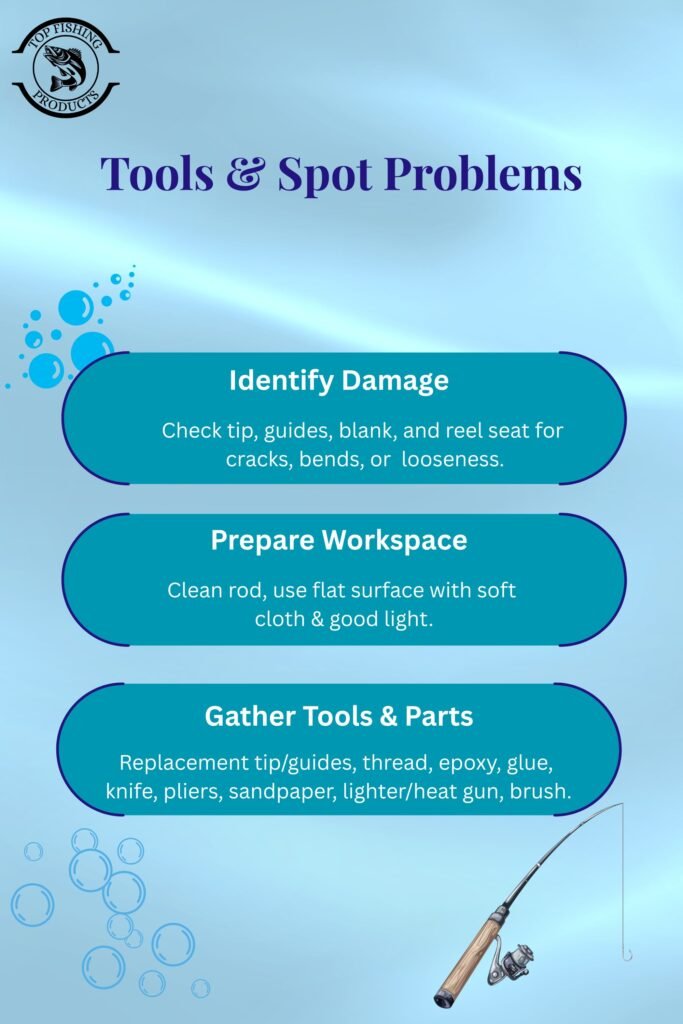
01. Identify the Damage
The first thing you need to do is look closely at the rod and try to find the damaged part. Just hold the rod gently, start noticing from the tip, the guides, the blank (body), and the reel seat. If something is missing from the tip, you can easily spot it because the top will be missing or jagged.
This way, you can easily judge that the tip of the rod is broken. Moving towards the guide, if you find any cracks, bent sides, or thread-loosing problems, then you need to fix the guide. On the other hand, the crack in the blank or body can be thin or hard to see. To find out the crack on the body, you just need to swipe your finger along the rod smoothly and softly, just to feel the rough spots or bends. Swipe your finger very softly because it could damage your finger.
Lastly, to check the reel seat, simply look for whether the reel moves or wiggles; it means that it needs to be tightened. These are the common problems that everyone can face with a fishing rod. To fix these problems and to know exactly what is wrong and how to choose the right method, check the guide below.
2. Prepare the workspace and gather parts
Before starting any repair, you need to clean the surface of the fishing rod. To make it clear, simply use if flat workspace and a good light. Lay down a soft cloth on the plane surface to protect the rod from scratches. Now get replacement parts, which include new tip replacement guides, repair s leave rod wrapping thread finishing epoxy, and a small bottle of strong glue for reel seats fixing.
For tools, you need a sharp knife, sandpaper, small pliers, a lighter or heat gun, and a small brush. The lighter will help you to soften the old glue and to remove it easily. Additionally, a small brush is useful to apply the epoxy for fixing the rod parts.
Keep everything ready and then start your fixing because it will save your time and prevent mistakes like glowing parts in the wrong place or leaving a repair to dry in a bad position.
Step 02: Fix the Fishing Rod Problems
There are 4-5 possible problems that every fisherman can face while fishing. In the guide below, you will find all the fixings regarding the fishing rod. Simply check your relevant problem and fix it with the method we mentioned below. Let’s roll into:
1. How to Fix the Rod Tip
To replace a broken tip, you need to warm the old glued area to remove it easily. The old glue will be very hard to remove, so we need to make it soft by using a lighter or a heating gun. Simply use a lighter around the glued area to make it soft and gently twist or pull towards outward to remove the glue. Now cut away any excessive cloth or threads just to even the look.

Now use a new tip and replace the tips properly with focus. Check the slide again until it fits straight. Now use it tiny amount of glue and place it inside the tip of the tube, and then push it inward to stick it properly. Hold the tip for a couple of seconds until the glue sets properly. At the end, just make sure the tip is aligned with the guide.
If you still feel that the tip is slightly loose after combining with glue, then you need to remove it and add a little more strong and stickier glue to re-seat it carefully.
2. How to fix a Damage Guide (Eyelet)
If a guide breaks, you need to cut off the old wrapping. To fix this problem, simply use a razor blade or a heating gun to remove the old glue or epoxy. Simply, use a heating gun to heat the area of the guide for a couple of minutes to soften the epoxy and remove the old guide and threads easily. For threads, use a razor or a sharp knife to cut the threads that are along with the guide foot.
To prepare the rod, use sandpaper to make the areas smooth. Remove all the leftover glue and make the area even and clean. Now add a new guide on the rod and align it properly with the size. You can use a small piece of masking tape to hold the guide in place. To make it tight, simply use threads from the foot of the guide upward.
Just wrap the threads again and again and end without a knot. Once you finish, simply trim the access thread. At the end, apply a thin layer of epoxy and coat the thread wrap evenly. Use a rod turner tool to spin the rod after the epoxy dries.
3. How to Fix a Snapped Rod Blank
A Snapped Rod blank is known as a break in the middle of a rod. It’s a very serious pair and needs to be treated on time to restore its function. To fix this problem, use sandpaper to smooth the jagged ends of broken sections. Use a small dowel rod, nail, or graphite section to fix the hollow ends of the broken rod.
Whatever method you are using, the piece should be long enough that it can be extended at least an inch into each section. Now, add glue or epoxy to the ends of the rod from where they broke and need to be fixed. Slide both of the broken sections and align the eyelets perfectly.
For extra strength, use threads and wrap them again and again. Coat the threads with super glue or epoxy to seal them completely and let them dry. This is how you can fix a snapped rod blank.
4. How to Recondition a Handle
To fix a handle repairing simply wash the grip. To wash in clean water, you need warm water, soap, and a sponge. If you find any cracks on the handle, simply apply wood filler on the damaged areas, then smooth the surface with sandpaper. At the end, apply cork for its protection and longevity.
On the other hand, you need to slide a piece of heated tube over the handle completely. Now, use a heat gun to shrink the tube to stick it in its exact place. This method is for a cosmetic fix. Lastly, for a broken handle, you can insert a dowel rod as an internal sleeve. When you insert the rod in the handle, then use epoxy or glue for stickiness.
5. How to Repair a Crack in the Blank With a Sleeve
A crack in the blank weakens the rod; for stronger repair, you need to fix it. Choose a carbon or fiberglass sleeve that fits tightly over the broken area. To ensure that the epoxy spreads evenly, remove any debris from the area and lightly sand it with sandpaper. Slide the sleeve over the crack and align it after applying a two-part epoxy to the sleeve and the blank.
To ensure that the sleeve attaches properly, there shouldn’t air bubbles. Simply spin the rod slowly while the epoxy is set and dry. This procedure stops the blank from splitting further and helps in the recovery of the rod’s strength.
6. How to Fix a Loose Reel Seat
A tight reel seat is necessary because a loose one makes it difficult to throw and battle fish. Examine the seat after removing the reel. If the seat is only loose, it can be secured in place with a thin layer of epoxy or marine-grade glue. You might need to replace the seat if it’s damaged.
In order for the reel to sit appropriately, make sure the reel seat is straight and centered while the adhesive dries. The seat will remain firm if the reel is secured. Once the adhesive has dried, test it and enjoy the fixing of the reel seat.
7. Final Checks and Testing
Check the durability and cleanliness of each repaired section once the repairs are finished. Run your finger along the wrapping and the blank to feel for any rough or soft parts. By looking down the rod from the end, check that all of the guides are aligned from the tip to the reel seat.
To inspect the action, wind up the reel and pass a line through the guides. To make sure the rod is comfortable and the fixed portions are sturdy when moving. Try a few gentle casts in a secure location, not in the water. Before you go fishing, spot it again if it moves or feels weak.
What Issues Can Occur with a Fishing Rod?
Fishing rods face many small dangers on each trip. A broken tip often happens when the rod is knocked against rocks, the boat, or when too much force is put on a snagged fish. Guides can crack or bend from impact or long use. A tiny chip in a guide will cut fishing line over time could be a reason. The blank can develop cracks from heavy loads or being stored against sharp edges.
Reel seats can be loose because the glue breaks down in heat, sun, and salt. Handles made of cork or foam can wear out from sweat, sun, and constant gripping. Knowing these issues helps you check your rod before each trip, so small problems do not turn into big breaks while you are fishing.
How Do You Set Up a Fishing Rod?
After fixing your fishing rod, the next step is learning how to set it up properly. Start by attaching the reel securely into the reel seat. Then, thread the fishing line through the guides from bottom to top. Next, just tie the hook or lure at the end of the line. Make sure the line is smooth and tight. Setting up your fishing rod correctly is an important factor and equivalent to the repairing process. It actually ensures better performance while fishing.
What Instruments or Equipment are Used to Fix a Rod?
Fixing a rod does not require expensive gear. A sharp knife is important for removing old wrappings and trimming thread. Sandpaper in a few grits helps clean and smooth parts before gluing. Small pliers and tweezers help hold tiny parts in place. A lighter or small heat tool softens old glue when removing tips. Replacement tips and guides matched to the rod size are essential parts.
Rod wrapping thread and a rod finishing epoxy seal to protect the new wraps. For crack repairs, you need a fiberglass or carbon sleeve and a strong two-part epoxy. A small brush or mixing stick is handy for applying epoxy, and a cloth to keep the workspace clean makes the job easier.
Is It Worth Fixing a Fishing Rod?
A common question people ask is whether it is worth fixing a fishing rod. The answer depends on the type of damage and the cost of repair. If the rod has minor issues like a broken tip or loose guides, then fixing it is definitely worth. Because repairs are cheap and easy. However, if the rod is very old, heavily cracked, or made of low-quality material then repairing will not work. Sometimes repairing old fishing rods is a better choice.
Best Fishing Rod Repair Tips
- When repairing a fishing rod, always work in a clean and well-lit place.
- Take your time and do not rush. Use strong glue that is made for fishing rods or sports equipment.
- When replacing guides or tips, make sure they are perfectly straight. It allows the line to flow smoothly.
- Always let the glue or epoxy dry completely before using the rod again. Proper care and repair not only fix the rod but also make it last longer.
Importance of Fixing a Fishing Rod
Repairing a rod keeps it in good condition and reduces costs. A well-kept rod feels dependable in your hands, casts smoothly, and attracts fish more successfully. By fixing small problems as soon as they appear, you may prevent bigger mistakes that could cost you a big fish or ruin your day.
Most fishermen associate their rod with special moments, such as their first big catch or a peaceful morning spent with friends. Those memories are kept connected to the same tool through repair rather than replacement. Repairing also helps the environment since it reduces waste from throwing out usable rods that can be fixed with easy fixes.
Final Thoughts
How to fix a fishing rod is the essential guide that people are looking for. With a few simple tools and a little perseverance, most rod problems can be fixed at home. Starting by assessing the damage, arranging your workspace, and then carefully replacing tips, guides, and repairing cracks or reel seats is the proper method.
Make sure everything is straight and solid by inspecting the rod to finish the process. Your rod will continue to provide you with enjoyable fishing experiences and many more trips if it is properly maintained.
Frequently Asked Questions:
How long does it take to fix a fishing rod?
Simple repairs like replacing a tip or a guide often take less than an hour of active work. Repairs that use epoxy or require sleeves may need several hours for the glue to cure fully, so plan to let the rod sit undisturbed until the material is hard.
Can I repair a fishing rod at home without professional help?
Yes, most common problems can be fixed at home. Basic repairs require patience and simple tools. For very large breaks or if you are not confident, a professional rod builder can make a stronger repair.
What if I do not have the exact replacement guide or tip?
Using a guide or tip that is close in size may work temporarily, but it is best to match sizes to keep the line running smoothly. If you cannot find an exact match, visit a sporting goods store or order parts online designed for rod repair.
Will a repaired rod be as strong as new?
If repaired correctly with the right materials, a rod can regain much of its original strength. Very severe breaks or long damaged sections may never be the same as new, but a good repair will make the rod safe and useful for many trips.