One of the most important aspects of fly fishing is how to tie a tippet to the leader. In fishing, the leader and tippet are both thin lines that must be connected. Your line will break, and you risk losing a fish if your knot is weak or tied incorrectly. Anglers use two main knots for this purpose.
The blood knot, which forms a straight and seamless connection, and the double surgeon’s knot, which is quick and strong to tie, are the two types. With practice, both may be learned, and you can employ the one that suits you the most. Let’s look into it:
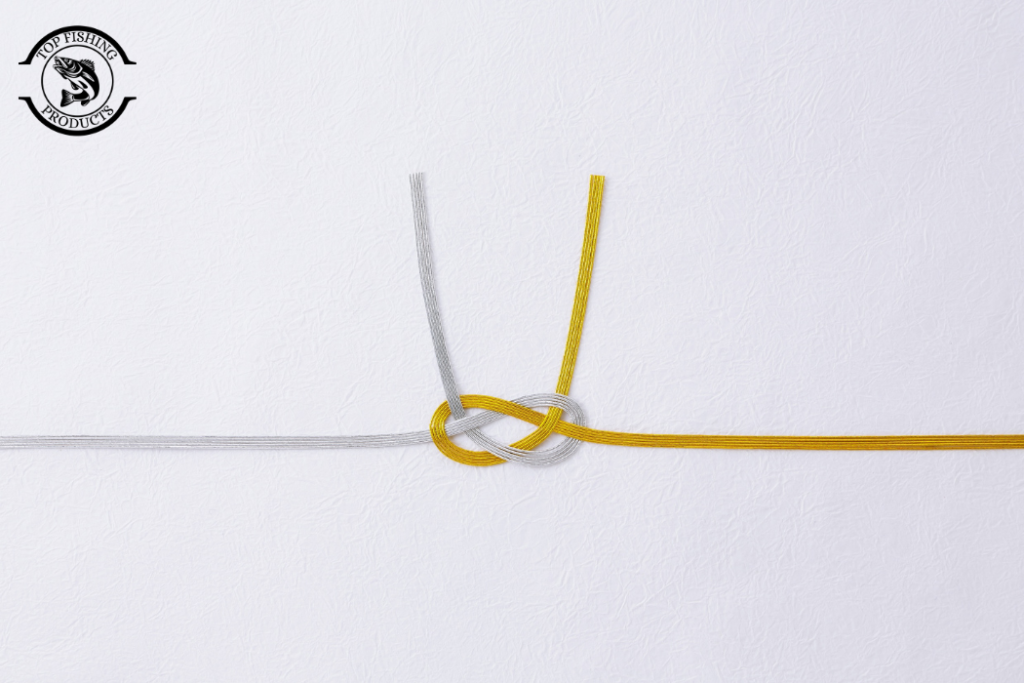
Method 1: Tying a Double Surgeon’s Knot
This is one of the most famous knots that people think is strong. It has very simple steps to tie but a few people can’t tie this knot. Some people wanted to know how to attach tippet to leader. For all of them, this knot-tying method is going to be adaptable. Let’s learn:
Step 1: Overlap the Leader and Tippet
Place the tippet and leader next to each other. Make sure they overlap by 15 centimeters, or 6 inches. The short ends that you will use to tie the knot, or the tag ends, should be placed in opposite ways. Pinch your thumb and forefinger around the lines to hold them together at the intersection.
Step 2: Create a Loop
Make a simple loop with both lines as one using your dominant hand. It’s like making the first part of an overhand knot. Once, pass the tippet’s and leader’s tag ends through this loop. It’s not the time to pull it tight. It will look a little like a soft pretzel, and the loop has to stay loose.
Step 3: Pass the Lines Through Again
The tag ends should be turned around and threaded through the loop again while the loop is still in the hand that doesn’t control it. At the end of the loop, it will now resemble a tiny braid. The strength of the double surgeon’s knot is provided by this second attempt.
Step 4: Moisten and Tighten
Wet the knot with a little saliva or lip balm before tying it securely. By removing friction, wetting enables the knot to close easily without causing damage to the line. Next, hold the tippet tag end and the leader line in one hand, and the leader tagging end and the tippet line in the other. Slowly and steadily tighten the knot until it is secure.
Step 5: Trimming Time
Once the knot is securely fastened, trim the tag ends with pliers, nail clippers, or small scissors. To ensure that no loose ends are visible, cut them as near to the knot as you can. This completes the double surgeon’s knot. One of the strongest join knots for joining your leader and tippet, it is also very dependable and simple to tie.
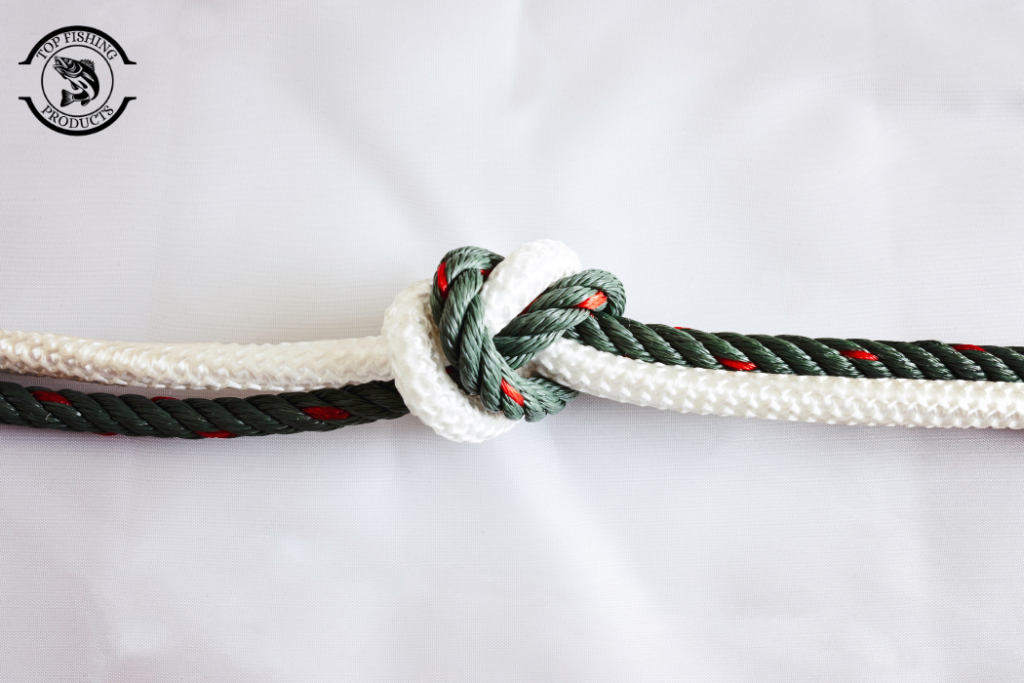
Method 2: Tying a Blood Knot
This knot is considered so strong and if you try this blood knot for fly fishing, you’ll not lose your caught fish at all. To make this knot, let’s follow the below steps:
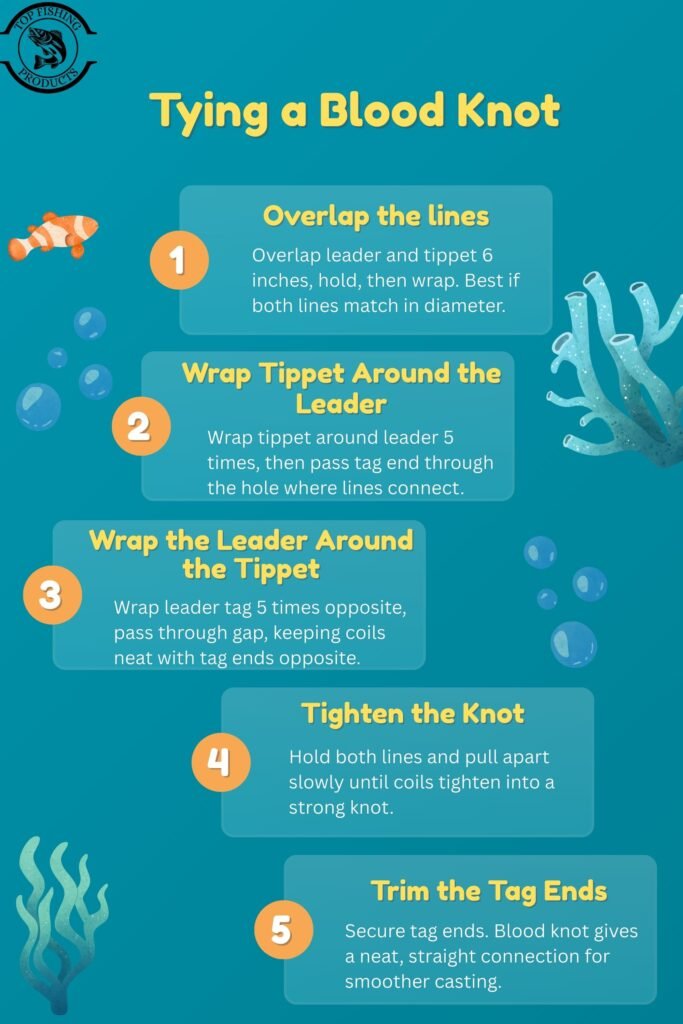
Step 1: Overlap the lines
About six inches should be covered between the leader and tippet. Using the hand that is not your dominant hand, hold them in the overlap area. Now you may start wrapping the lines with your free hand. It is best for the blood knot if both lines have the same diameter.
Step 2: Wrap Tippet Around the Leader
Wrap the tippet around the leader line, beginning at the tag end. Five times, coil neatly and tightly, like a spring. Following the creation of the wraps, bring the tag end back and insert it through the small hole where the two lines connect.
Step 3: Wrap the Leader Around the Tippet
Next, repeat the process with the end of the leader tag. Five times, wrap it in the other direction around the tippet line. Finally, pass the leader tag end through the middle gap after bringing it back. At this point, the coils should be neatly arranged side by side, and the two tag ends should be hanging in opposite directions, one up and one down.
Step 4: Tighten the Knot
Holding the tippet and leader’s main lines in each hand, slowly separate them. The coils will remain attached to each other and tighten as you pull them apart. Until the knot is tight and strong, keep pulling them apart.
Step 5: Trim the Tag Ends
Secure the tag ends at the coils next to them after tying the knot tight. A smoother casting is made possible by the blood knot’s neat and straight connection. Although it loses the double surgeon’s knot’s strength, its neat appearance makes it the preferred method.
Method 3: Tie Orvis Tippet Knot
The Orvis Tippet Knot has a very unique function in fly fishing, while it is less well-known than the double surgeon’s knot or the blood knot. When you are already out fishing with one or more flies, the knot is designed to save time and make it easier to attach more tippet material. I’ll answer “How do you tie a fly fishing knot?” below.
You can use it to quickly attach a dropper or repair a broken tag, but it is especially useful for European catching and loch-style fishing. For attaching a second fly, the knot creates a neat 90-degree tag end. Let’s check it with a step-by-step guide and look at how to tie a fly to a leader:
Step 1: Thread the Tippet
Start by passing the tippet’s end through the leader’s loop to the desired attachment location. To ensure you have enough line on each side to tie the knot, pass the tippet through. Leave enough of the tag end so that you can tie the knot and have some extra to add a dropper if that’s what you want.
Step 2: Wrap the Tag End
Then take the tag end of the tippet and wrap it around both the leader and the tippet line. Double back two times around the lines. These wraps secure the knot, so attempt to keep them even and tidy.
Step 3: Pass the Tag End Back
Bring the tag end forward and continue through the same loop you started after completing the wraps. As a result, the locking operation is secure. To ensure a neat and secure knot, make sure the tag end leaves on the same side as it started.
Step 4: Tighten the Knot Slowly
To reduce friction, soak the knot with a small amount of water or saliva. Start tightening the knot by pushing on the standing parts of the tippet and leader. The wraps will tighten into a secure knot as you tighten them. Pull slowly and carefully until it closes all the way.
Step 5: Adjust the Ninety-Degree Tag End
One advantage of the Orvis Tippet Knot is that it creates the perfect angle in the tag, which is perfect for securing a dropper fly. Add a simple half hitch for an even nicer sit for the tag end at 90 degrees. This extra step keeps your dropper in the proper place and secures the tag.
Step 6: Trim the Excess Line
Finally, cut any extra tag ends close to the knot. If you need to tie on another fly, make sure the dropper tag is long enough. If you are adding tippet for a single fly, trim the end neatly and short.
Conclusion
One of the most basic yet important fly fishing skills is learning how to tie a tippet to a leader. The double surgeon’s knot is quick, simple to use, and incredibly strong, making it excellent for beginners and for times when you need dependability. Although it takes a little more work, the blood knot creates a straight connection that works well for casting.
No doubt, all methods allow you to choose the simplest or most suitable approach for the situation. To prevent tangles, always moisten your knots before tightening them, and trim the tag ends cleanly. By learning an easy way to tie tippet to leader, these knots will become effortless with practice, making you able to concentrate more on fishing and less on your line.
Frequently Asked Questions:
What is the easiest knot for tying a tippet to a leader?
The double surgeon’s knot is usually the easiest knot to learn. It is quick to tie and very strong, which makes it perfect for beginners.
Why should I moisten the knot before tightening?
Moistening the knot with saliva or lip balm reduces friction, which helps the knot close smoothly and prevents the line from weakening or breaking.
Which knot is stronger, the blood knot or the double surgeon’s knot?
The double surgeon’s knot is generally stronger and more secure, while the blood knot gives a straighter and cleaner connection for smoother casting.
Can I use these knots for any fishing lines?
Both knots work best when the lines are of similar diameter, such as when connecting a tippet to a leader in fly fishing. If the lines are very different in thickness, other knots may work better.